Wednesday, September 23, 2020

Wednesday, September 16, 2020
Monday, May 11, 2020
How to Enable, Manage, and Delete Secret Conversations in Facebook Messenger (Updated Guide 2026)
Want to keep your Facebook Messenger chats completely private and secure? Whether you need to send sensitive information, protect a private conversation, or automatically clear old messages, Messenger’s end-to-end encrypted (E2EE) features give you total control over your privacy.
This comprehensive guide covers how to enable and manage Secret Conversations, set auto-delete timers, safely delete chats, and essential Do’s and Don’ts for private messaging.
1. What Are Secret Conversations in Messenger?
Secret Conversations use end-to-end encryption (E2EE), meaning only you and the recipient can read what is sent. Neither Facebook, hackers, nor third parties can intercept or view your messages.
Important Update: Messenger now automatically protects most personal 1-on-1 chats with default end-to-end encryption. However, you can still manually trigger disappearing messages or start separate secret chats with custom timers.
2. How to Enable & Manage Secret Conversations
Depending on your mobile app version, you can start or manage secret chats using two quick methods:
- Start from Chat Profile
Method 1
Open Messenger and select the person you want to message privately. Tap their profile picture or the info (i) icon at the top right, then scroll down and select Go to Secret Conversation. - Start from New Message
Method 2
From the main Chats tab, tap the Pencil icon (Top Right). Toggle the Padlock icon in the top-right corner to turn on secret mode, then select the recipient. - Manage Encrypted Storage & Keys
Account Settings
To manage your device keys or access encrypted history on a new phone, go to Settings > Privacy & Safety > End-to-End Encrypted Chats. Here you can manage your Secure Storage PIN or check active authorized devices.
How to Disable Secret Conversations
Because 1-on-1 chats are now encrypted by default, you cannot toggle off encryption globally. However, if you want to turn off disappearing message timers or remove an active secret chat thread, open the chat settings (info icon) and select Disappearing Messages > Off.
3. How to Set a Timer for Automatic Message Deletion (Disappearing Messages)
Want your messages to self-destruct after being read? Messenger allows you to set a disappearing timer.
- Open the secret or encrypted chat.
- Tap the contact’s profile picture / (i) icon at the top.
- Tap Disappearing Messages.
- Choose your desired timer (e.g., 5 seconds, 1 minute, 1 hour, or 24 hours).
- Return to the chat. A notice will show that disappearing messages are on. Every message sent will automatically vanish once the timer runs out after viewing.
4. How to Delete Secret Conversations
Deleting a secret chat removes it permanently from your app.
Method 1: Delete an Individual Secret Chat
- Android: On the main Chats list, press and hold the secret chat thread (marked with a lock icon) and tap Delete.
- iOS (iPhone): Swipe left on the secret chat thread and tap Delete (Trash icon).
Method 2: Clear All Secret Conversations from Settings
- Tap your Profile / Menu icon in Messenger.
- Go to Settings > Privacy & Safety > End-to-End Encrypted Chats.
- Select Delete Chat History or manage active sessions under Security Alerts to sign out unauthorized devices.
5. Do’s and Don’ts for Secret Conversations
To ensure your chats stay 100% private and safe, keep these critical guidelines in mind:
 DO's
DO's
- DO Set Short Timers for Sensitive Info: Use a 5-to-30-second timer when sharing temporary passwords, financial details, or confidential photos.
- DO Verify Encryption Keys: If discussing highly sensitive topics, tap the user's profile icon in chat, select Verify Encryption, and compare the security numbers to ensure no middle-man is intercepting.
- DO Set Up a Secure Storage PIN: Create a 6-digit PIN in Messenger settings so you can recover your encrypted chat history if you get a new phone.
 DON'Ts
- DON'T Rely Solely on Self-Destruction for Trust: The other user can still take a photo of their screen using another phone or camera before the message disappears.
- DON'T Forget About Screenshots: While Messenger alerts you if someone takes a screenshot in Vanish/Disappearing mode on mobile, it isn't always foolproof across desktop or web clients.
- DON'T Share PINs or Recovery Codes: Never give your Messenger Secure Storage PIN to anyone—it grants full access to decrypt your chat archives
Managing Multiple Devices
You can still use Messenger across more than one device, but each device needs its own copy of the encryption keys to read your encrypted history:
- When you sign in on a new device, you'll be asked to restore your encrypted chats using your Secure Storage recovery method.
- You can see which devices are currently logged into your encrypted chats, and remove a device you no longer use, from Privacy & safety > End-to-end encrypted chats in Settings.
- Removing a device there means that device can no longer send or receive encrypted messages until it's set up again.
Frequently Asked Questions
Can I turn off default encryption for my personal chats? No — for personal one-on-one and group chats, encryption is now the standard rather than a setting you control. If you need to message someone without encryption, that generally only applies to business-style messaging that uses a different, non-encrypted system.
I don't see a "Secret Conversations" option anywhere — is something wrong with my app? No. That menu was removed because its function has been absorbed into default encryption. If your personal chats show "End-to-end encrypted" under the contact's name, you already have the protection the old feature used to provide manually.
Is this as secure as Signal or WhatsApp? Messenger's default encryption is built on the same Signal Protocol used by those apps, so the cryptographic guarantee for message content is comparable. As with any messaging app, though, encryption protects what's inside your messages — it doesn't erase metadata (like who you talked to and when), and it can't stop someone from screenshotting or forwarding a message once they've received it.
The Bottom Line
The manual, easy-to-forget Secret Conversations feature from 2020 has been replaced by something that mostly runs in the background. That's a real improvement for everyday privacy — but it does shift some responsibility onto you, mainly around setting up Secure Storage so you don't lose encrypted chat history when you change devices. Take a few minutes to confirm your recovery method is set, and you're set up for how Messenger privacy actually works in 2026.
Monday, December 2, 2019
How to lock your Facebook Profile Privacy Settings ( Updated 2026)
How to Lock Your Facebook Profile Privacy Settings
If you are concerned about unwittingly over-sharing posts on Facebook, keeping your personal information private is key. Below are updated tips and step-by-step directions to lock down your Facebook profile and keep your account secure.
1. Lockdown Your Profile & Future Posts
To ensure non-friends cannot view your main content or future activities:
- Open Settings & Privacy
Click or tap your profile picture (top right on web / bottom right on mobile) and select Settings & Privacy > Settings. - Navigate to Posts Settings
In the left menu, select Privacy (or search for Posts in Meta Accounts Center / Mobile Settings). - Set Audience to Friends or Only Me
Under Your Activity, find Who can see your future posts?. Change the audience selector from Public to Friends or Only Me.
2. Limit Who Can See Old Posts
Even if you set future posts to private, older public posts remain visible to everyone unless you restrict them.
- Go to Settings & Privacy > Settings > Privacy.
- Look for Limit the audience for posts you've shared with friends of friends or Public? under Your Activity.
- Click Limit Past Posts, then confirm by clicking Limit Past Posts in the pop-up warning.
3. Control Audience for Individual Posts
You can customize post visibility on a post-by-post basis before publishing:
- Click What's on your mind? to create a post.
- Click the Audience Selector button right below your name (it usually says Friends or Public).
- Select Friends, Friends except..., or Custom to choose specific people allowed to see or blocked from seeing that post.
- Click Done / Save Changes and publish your update.
4. Hide Your Birthday & Age
Protect your birth date from public view for personal privacy and security:
- Go to your Profile and click the About tab.
- Select Contact and basic info.
- Scroll down to Basic Info where your Date of Birth and Birth Year are listed.
- Click the Audience icon next to your birth date/year and change it to Friends or Only Me.
5. Hide Your Friend List
To prevent strangers or non-friends from browsing your full network:
- Open your profile and click the Friends tab.
- Click the three dots (...) or the Pencil icon on the top right of the Friends section.
- Select Edit Privacy.
- Change Who can see your friends list? to Only Me or Friends.
6. Limit Friend Requests
Stop unwanted friend requests from strangers:
- Open Settings & Privacy > Settings.
- Select Privacy and look for How people find and contact you.
- Next to Who can send you friend requests?, change Everyone to Friends of friends.
7. Blocking Specific Users
Blocking completely prevents a user from viewing your profile, sending messages, or finding you in search:
- Open Blocking Settings
Navigate to Settings & Privacy > Settings > Blocking (or Audience and Visibility > Blocking). - Add User to Block List
Click Edit next to Block users, then click Add to Block List. - Search and Confirm
Type the name of the profile you want to block, click Block next to their name, and confirm.
8. One-Click Profile Lock (Mobile Feature)
If the Lock Profile feature is available in your country/region, you can apply all major privacy protections in a single tap:
- Open the Facebook app and tap your profile icon.
- Tap the three dots (...) next to Edit Profile.
- Tap Lock Profile and confirm by pressing Lock Your Profile.
Summary
Taking control of your Facebook privacy requires reviewing these settings periodically as features evolve. By setting your default post audience to Friends, limiting past posts, and restricting basic profile details like your birthday and friend list, you maintain full control over who sees your online footprint.
Sunday, January 25, 2015
"Documents.library-ms" is no longer working - Windows 7


Tuesday, October 7, 2014
How to Change Or Fix A Bad File Association - Windows 7
Fixing or changing a file association is very simple. For example, if you accidentally associated .pdf files with a program that cannot open them, you can change the association back to Adobe Reader (or another PDF reader that can open them). Simply follow this procedure:
- Right-click the respective file, for example a PDF file.
- Select > Open With from the right-click menu.

- The > Open with window will open and now you can either pick a program from the list of >Other Programs or click the > Browse… button and find the application you want to open this file type with.

- If you want to make the change permanent, check the box next to > Always use the selected program to open this kind of file.

- Finally, click > OK and, given you checked the respective box, all your PDF files should now open with the program of your choice.

Tuesday, May 27, 2014
How to Fix Temporary Profile in Windows 7
b) Start registry editor by typing regedit in find box of Windows 7.
c) Navigate the following location.


b) Desktop
c) Favorites
d) Any outlook PST files (find more information about location of PST files here)

Wednesday, May 14, 2014
Ankit Fadia Hacking Ebooks Collection
2 . Untold Windows Tips and Secrets(Ankit Fadia)
3 . Base64 Encoding Torn Apart
4 . Batch File Programing - Ankit Fadia
5 . Closing Open Holes
6 . Defacing Websites A step Process By Ankit fadia
7 . Dos Attacked
8 . Ankit Fadia - Encryption Algorithms Explained
9 . Firewalls - How to unblock it??
10 . FTP Exploits By Ankit Fadia.pdf
11 . Gathering info on Remote Host
12 . Hacking into Linux
13 . More Password Cracking Decrypted
14 . Removing Banners from your sites
15 . Sendmail and Beyond
16.SSL Torn Apart
17.Tracing IP,DNS,WHOIS-nslLookUp
18.Transparent Proxies in Squid
19.Transparent_proxies_with_Squid_By-Ankit Fadia
20.Truths!!!--What They Don't teach in Manuals!!!

Saturday, February 1, 2014
Outlook PST Repair Tool
Product Features
|

1.Comprehensive log icon creation process.
2.Comes with PST icon search option.
3.Mails’ icon previewing.
4.Lets users save PST files to your chosen icon location.
5.Encrypted icon of PST files recovery.
6.Selective icon recovery support.
7.Fixes large icon of files with PST formats.
8.Saves electronic mails in diverse icon formats.
9.Updated GUI feel and appearance.


Sunday, July 28, 2013
Use Whatsapp on Your Computer
Use WhatsApp On Computer.
Unfortunately if you dont own a Smart phone then you might not be able to use whatsapp. But don't worry today we Will learn How to use WhatsApp On PC as well.
You can Use it On both Windows and Mac.
To Run Whatsapp on Pc, We will Require Android Emulator, Android Emulator Helps us to Run Whatsapp on PC.
Step 1: Youwave And Bluestack Are the Two Android Emulator which enable us to Run Whatsapp or any other Android App on PC.
http://www.bluestacks.com/
Step 2: If you Go for Bluestack then Download and install it, then run the Bluestack and Click on " Apps " Then Click on the Tab " Social " and select " Whatsapp " and Install it.
Step 3: If you Go for Youwave then just download and install.
Now download Whatsapp.apk and move the downloaded file to PC directory.
To Check PC's Directory, Open Youwave click on help > Instruction. Now move your
whatsapp.apk file in to that directory . Then Click on View then Redraw Icons.
After Installing Whatsapp on Youwave or Bluestack you have to enter Mobile number which is not used earlier For Whatsapp account. Then they will take 5 Minutes to verify and will send you Code.
Enter that code and thats all.
Tuesday, July 16, 2013
Data Recovery Pro — Recover Deleted Files and Emails
As well as email, Data Recovery Pro can recover a wide variety of file types. It has the ability to retrieve missing files from many peripheral storage devices, including your iPod Shuffle, iPod Nano, and iPod Classic. Data Recovery Pro is so sophisticated it can even recover files from freshly formatted or partitioned drives. A completely updated filter technology allows you to easily search for "lost" text, allowing you to find files by searching for just a key word or phrase.
Using ParetoLogic's easy-to-use interface, Data Recovery Pro guides you through the steps of finding files and recovering them. You can preview most files before recovery or even search for text that might be in a lost file. It allows you to sort the list of what is recoverable to easily find what you are looking for.
As with all ParetoLogic software, Data Recovery Pro is backed by the company's excellent customer care and support program. Our staff is here to help you.
Email and file recovery program's features and benefits:

- Can find and retrieve deleted email and deleted email attachments
- Revives files from even freshly formatted or partitioned drives
- Recovers a wide variety of file types, including recycled, compressed and encrypted.
- It has the ability to retrieve missing files from many peripheral storage devices
- Able to recover missing songs from your iPod Shuffle, iPod Nano, and iPod Classic (iPod Touch and the iPhone not currently supported)
- Can save recovered files to a selected destination
- Revives files from your Windows PC
- Search for keywords and phrases in deleted files
- Features a small footprint that doesn't take up much space, but still more than powerful enough to scan quickly and recover your files


Tuesday, June 11, 2013
SecretPad
SecretPad is a simple plain text encrypter. Its interface is very similar to Windows Notepad. It can be used for storage of passwords, personal records, secret correspondence etc.
- Trusty encryption algorithm.
- Automatically closing the window in case of long inactivity.
- Url detection.
- Unicode support.
- No installation is required.
- Implements all the functions available in the "Notepad".

Thursday, January 24, 2013
Collection of All Google Tricks/ I am feeling lucky
Collection of All Google Tricks/ I am feeling lucky
Zerg Rush
Go to Google.com and Type "Zerg Rush".
Google Sphere
Go to Google.com and Type "Google Sphere" and click on i am feeling lucky .
Do a barrel roll
Go to Google.com and Type "Do a barrel roll" and click on i am feeling lucky .
Google chuck norris kisses rajnikanth
Go to Google.com and Type "Google chuck norris kisses rajnikanth" and click on i am feeling lucky .
Google gravity
Go to Google.com and Type "google gravity" and click on i am feeling lucky .
Google chuck norris/ find chuck norris
Go to Google.com and Type "google chuck norris" or "find chuck norris" and click on i am feeling lucky .
Google loco
Go to Google.com and Type "google loco" and click on i am feeling lucky .
Google Pacman
Go to Google.com and Type "google pacman" and click on i am feeling lucky .
Google Hacker
Go to Google.com and Type "google hacker" or"google 133t" and click on first link.
Hexadecimal / Binary / Octal
Go to Google.com and Type "Hexadeciamal" /"Binary" / "Octal" number of results are showing in above number systems.
Google Pirate
Go to Google.com and Type "google pirate" and click on i am feeling lucky .
Google Rainbow
Go to Google.com and Type "google rainbow" and click on i am feeling lucky .
Dark Google
Go to Google.com and Type "dark google" and click on i am feeling lucky .
Google mirror
Go to Google.com and Type "google mirror" and click on i am feeling lucky .
Google Terminal
Go to Google.com and Type "google terminal" and click on i am feeling lucky .
Make google logo black and white
Go to Google.com and Type "make google logo black and white" and click on i am feeling lucky .
Google underwater
Go to Google.com and Type "google underwater" and click on i am feeling lucky .
Epic google
Go to Google.com and Type "Epic google" and click on i am feeling lucky .
Here we have added 18 google fun tricks, soon we will add more tricks about google. If you know any tricks comment below.
Tuesday, January 15, 2013
New Facebook Emoticons
Our facebook chat emoticons are all uniques and we often update our site with new content so stay tuned and like our facebook page to receive all the news about the new facebook emoticons we will post. Our facebook emoticons list is really easy to use, in fact all you need to do is copy the corresponding facebook emoticon code.
You can find the code below any emoticons image, and paste it on any facebook chat window or private messages, then hit the Send button and you will see that the code sent will turn in a fantastic facebook emoticon! Don't miss any of our updates: new emoticons for facebook are added every week, so like our facebook page and check it often to find about the new emoticons.
 Copy the emoticon code to facebook chat: |  Copy the emoticon code to facebook chat: |
 Copy the emoticon code to facebook chat: |  Copy the emoticon code to facebook chat: |
 Copy the emoticon code to facebook chat: |  Copy the emoticon code to facebook chat: |
 Copy the emoticon code to facebook chat: |  Copy the emoticon code to facebook chat: |
 Copy the emoticon code to facebook chat: | 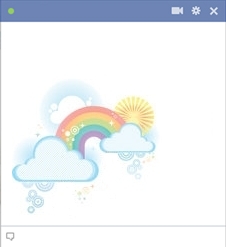 Copy the emoticon code to facebook chat: |
 Copy the emoticon code to facebook chat: |  Copy the emoticon code to facebook chat: |
 Copy the emoticon code to facebook chat: |  Copy the emoticon code to facebook chat: |
 Copy the emoticon code to facebook chat: |  Copy the emoticon code to facebook chat: |
 Copy the emoticon code to facebook chat: |  Copy the emoticon code to facebook chat: |